Project Overview
For the 3-D print rotation we had multiple options for what to design and print. The options were a phone holder, toothbrush holder, earbud holder or a coin holder. I chose the coin holder because I thought it would be something fun to design.
Research
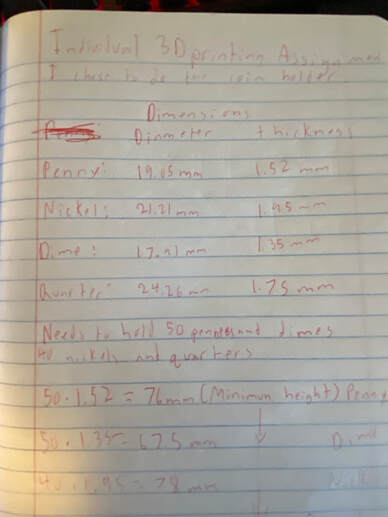
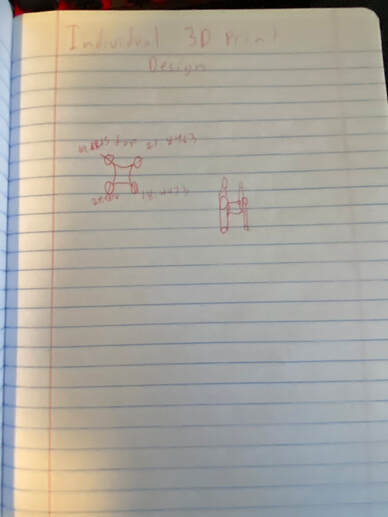
Before I started designing the coin holder I had to do research to find out the dimensions of the coins. I used the U.S mint website to get the dimensions. For this project it had to hold 50 pennies, 50 dimes, 40 nickels and 40 quarters. I did some math to find the minimum heights to hold all the coins. For all the dimensions I got I had to add 3% to account for the printer. I then drew a rough sketch off my idea.
|
|
Inventor and Maker Bot
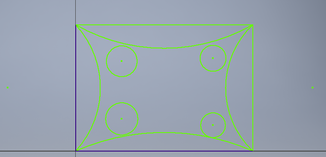
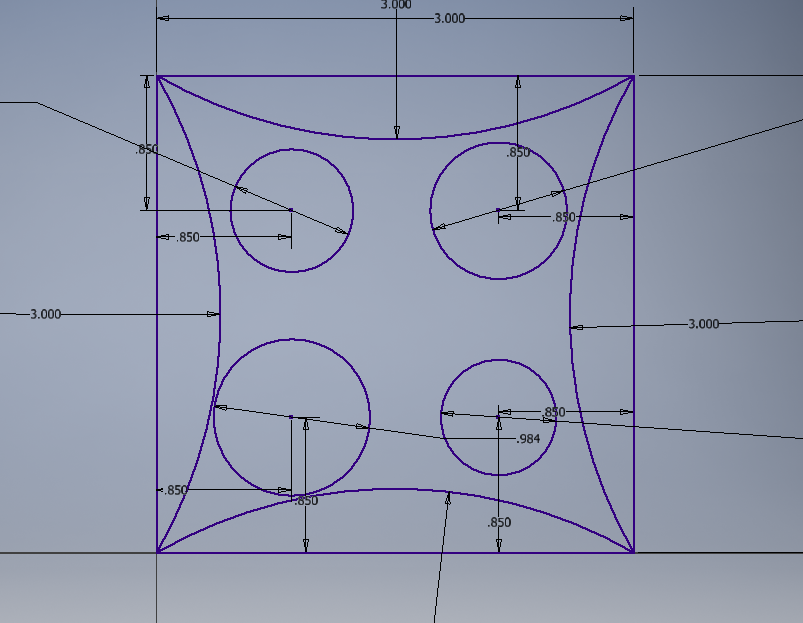
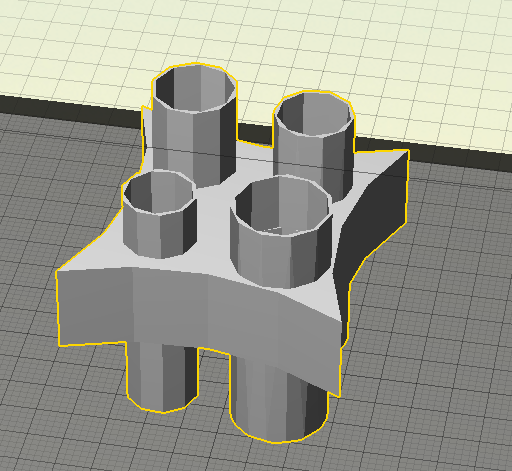
The next step was creating it in inventor. I started by designing the middle base section, to do this I created a rough shape then dimensioned that shape to what I needed, finally I extruded that figure. Next I had to create the four different columns that will hold the coins. Each one was slightly different to accommodate for that specific coin's dimensions. After creating these four columns I created an assembly file. I constrained each column with the corresponding hole on the base and made them all flush with each other. Then I exported that file to maker bot and scaled and orientated it.
|
|
|
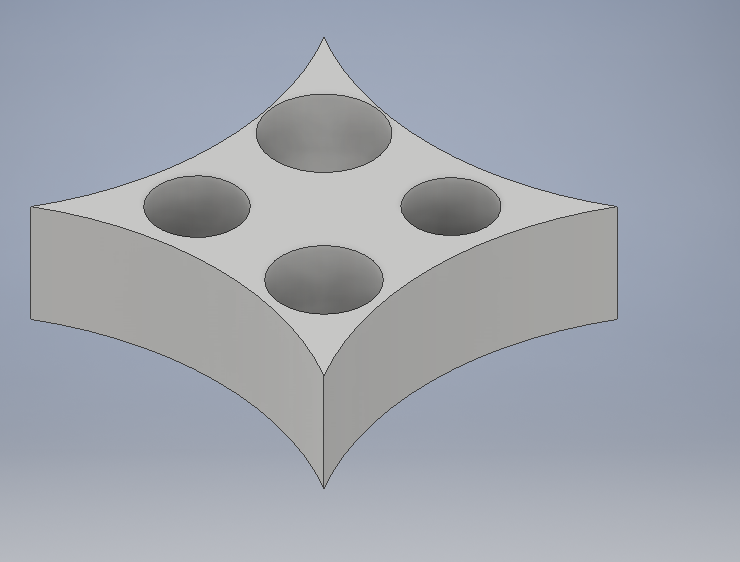
This is the design of the middle section which holds the tubes.
|
|
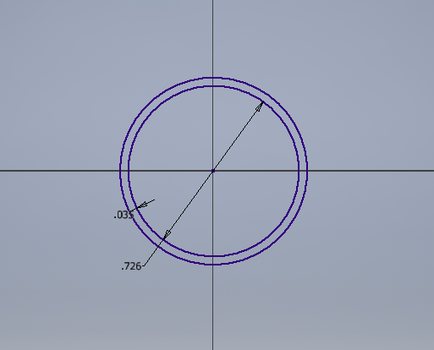
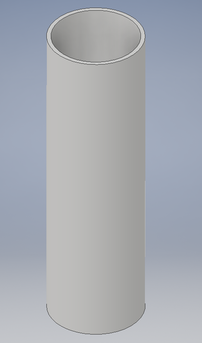
This is an example of the columns that hold the coins. This specific one is for dimes. The process was the same for each one just different dimensions
|
|
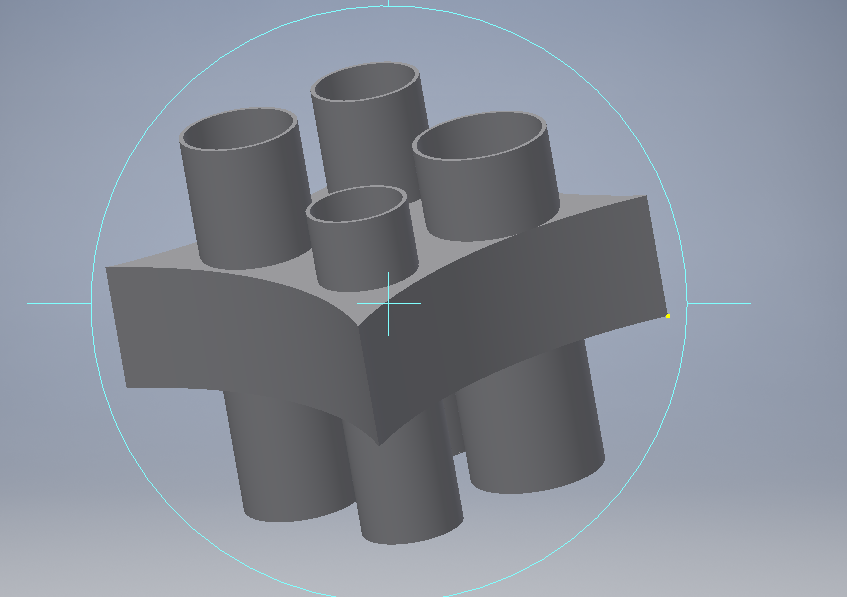
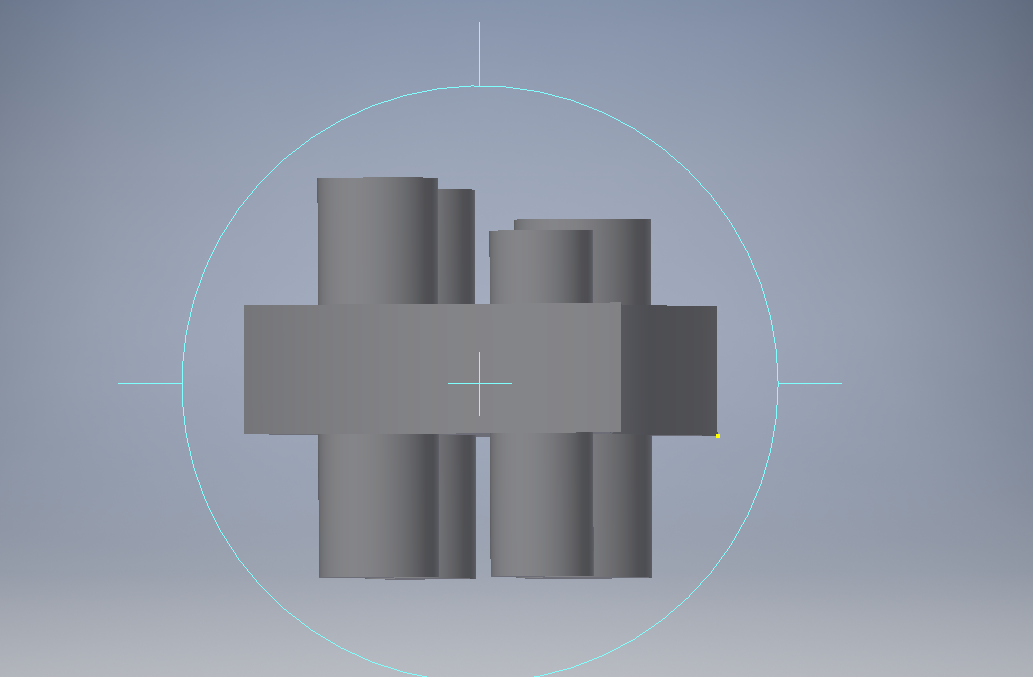
This is the assembly of all the parts.
|

|
Here is the Maker Bot set up and print preview screen.
What I learned...
From the individual 3-D print unit I was able to learn more about the process of designing something. I learned that before you start you need to get dimensions and some calculations in order for the project to be successful. This is interesting because for being a relatively simple concept their is a decent amount of pre work needed. I also expanded some of my Inventor skills by using the assembly feature.
